Assembly Guide
Still under construction along with a detailed video.
Set up
Check your parts
Check you have all the major parts.
4x 4080 700mm
2x 4080 600mm
2x 4080 484mm
2x 4040 500mm
1x 4040 484mm
2x 4040 400mm
23x L bracket connector set
4x large brackets
6x universal brackets
1x Allen key set
1x spanner
1x spirit level
Set up
Understand the different types of fasteners
Read our post on the different types of fasteners for aluminium profiles.

Notes
Before starting
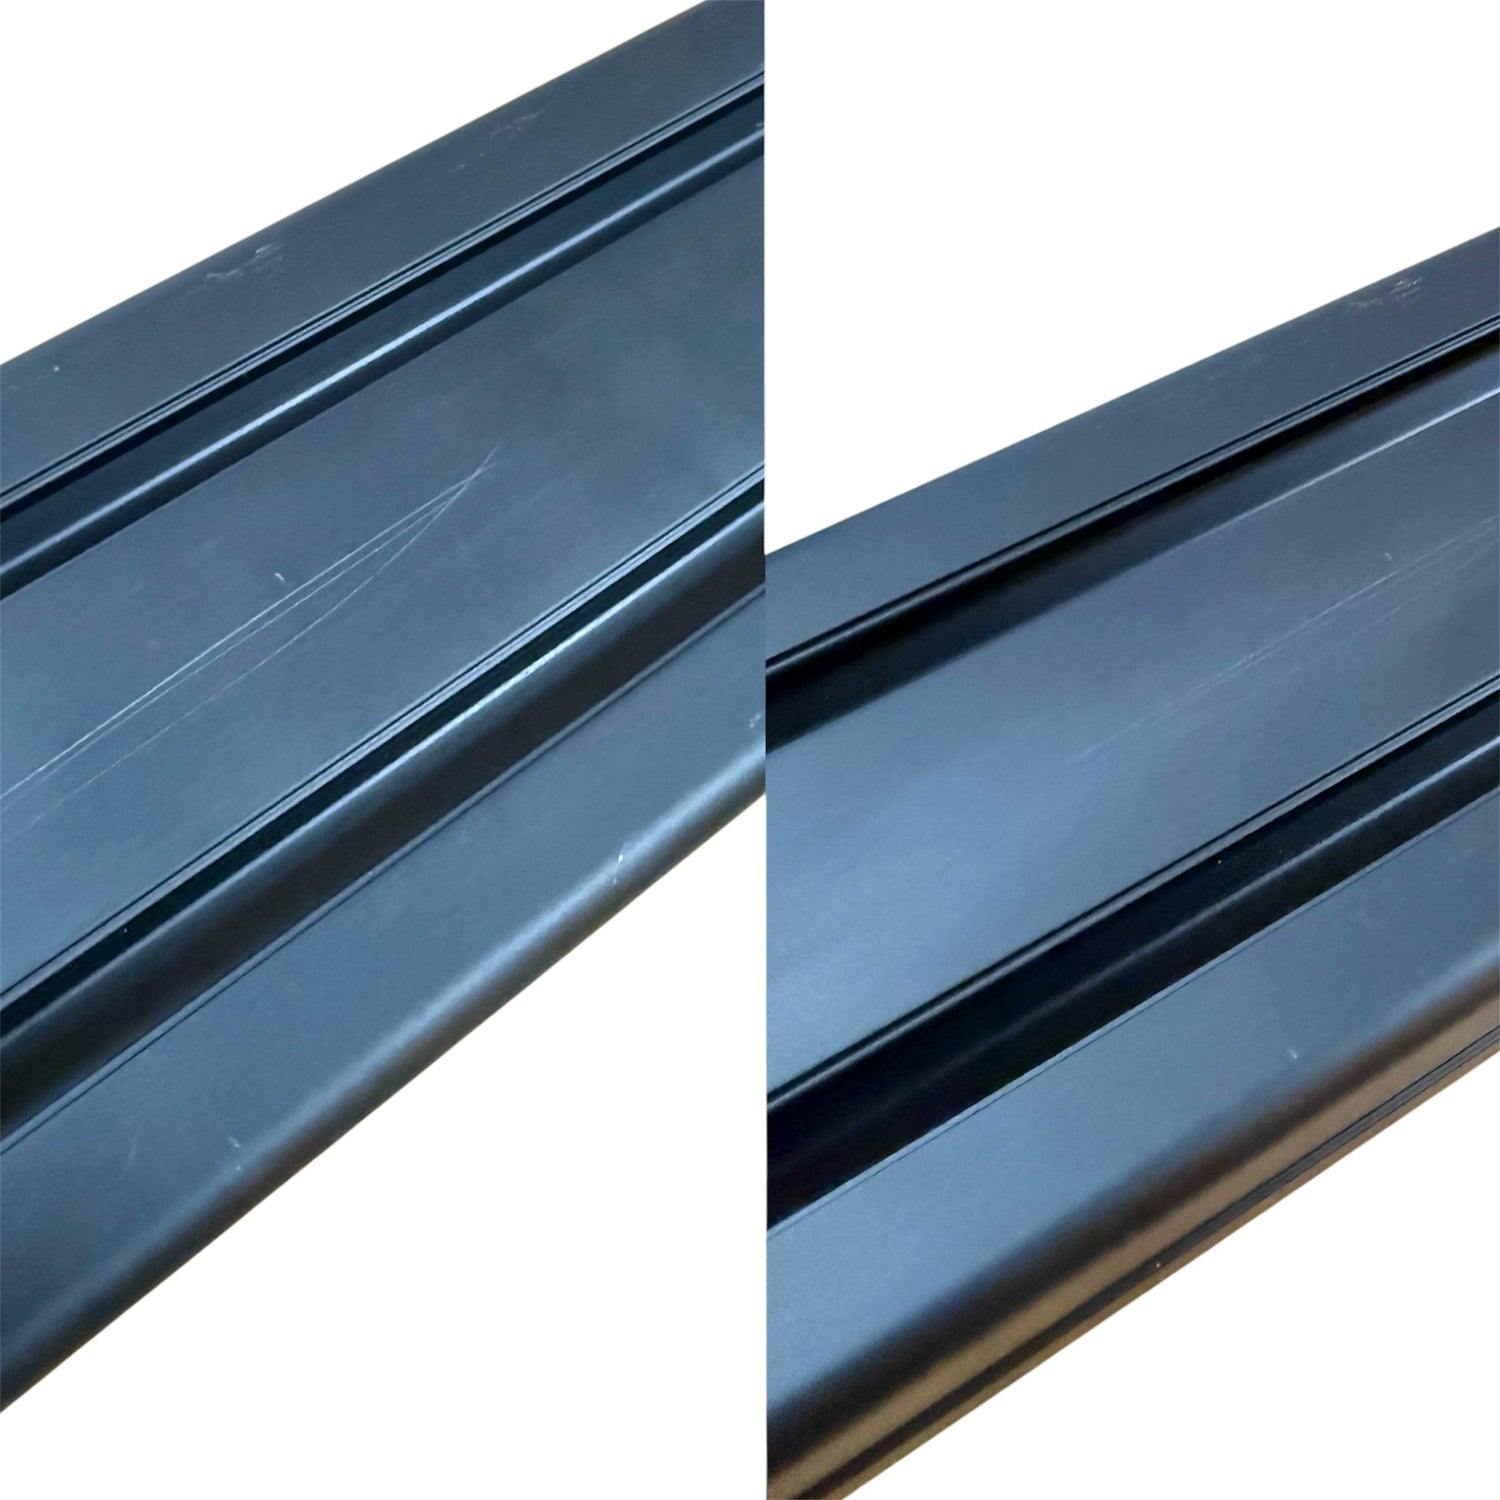
The profiles are anodised aluminium. They can be scratched without careful assembly however if there does appear to be a scratch most of the time they can be rubbed off with your fingers.

Notes
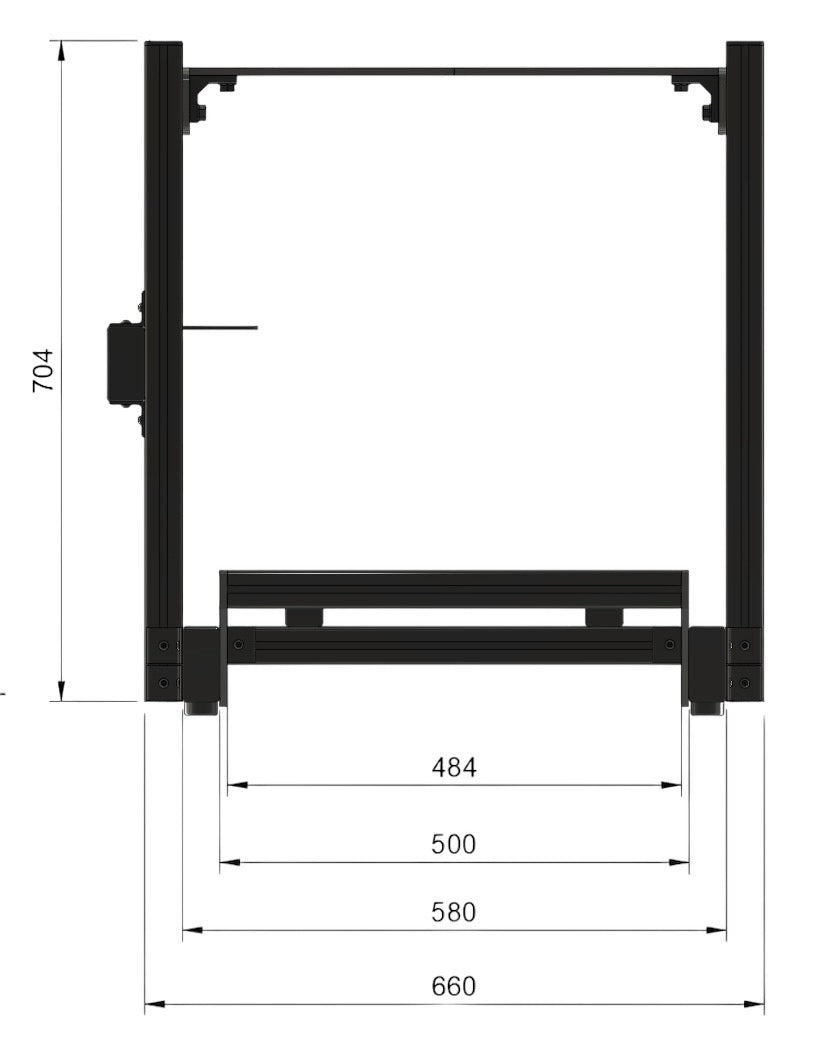
Use the 3D model, images, and drawings on the product page to check how the rig should look.
The build
Start by attaching the shortest 4040, 400mm, to the sliders
The build
You will need to manually move the slider to allow access to bolt them down.
Push down hard because the sliders can be hard to move.
The build
Attach the slider section to the bottom of the seat. This will require manually moving the slider again.
The build
Wedge the slider lever between the two sliders once they are securely attached to the seat. This will require a large amount of force and should snap into place.
The build
Be careful with the edges of the aluminium profile as they are sharp and can damage floors with the weight of the seat.
If you have carpet or floor protection you can test the slider assembly.

The build
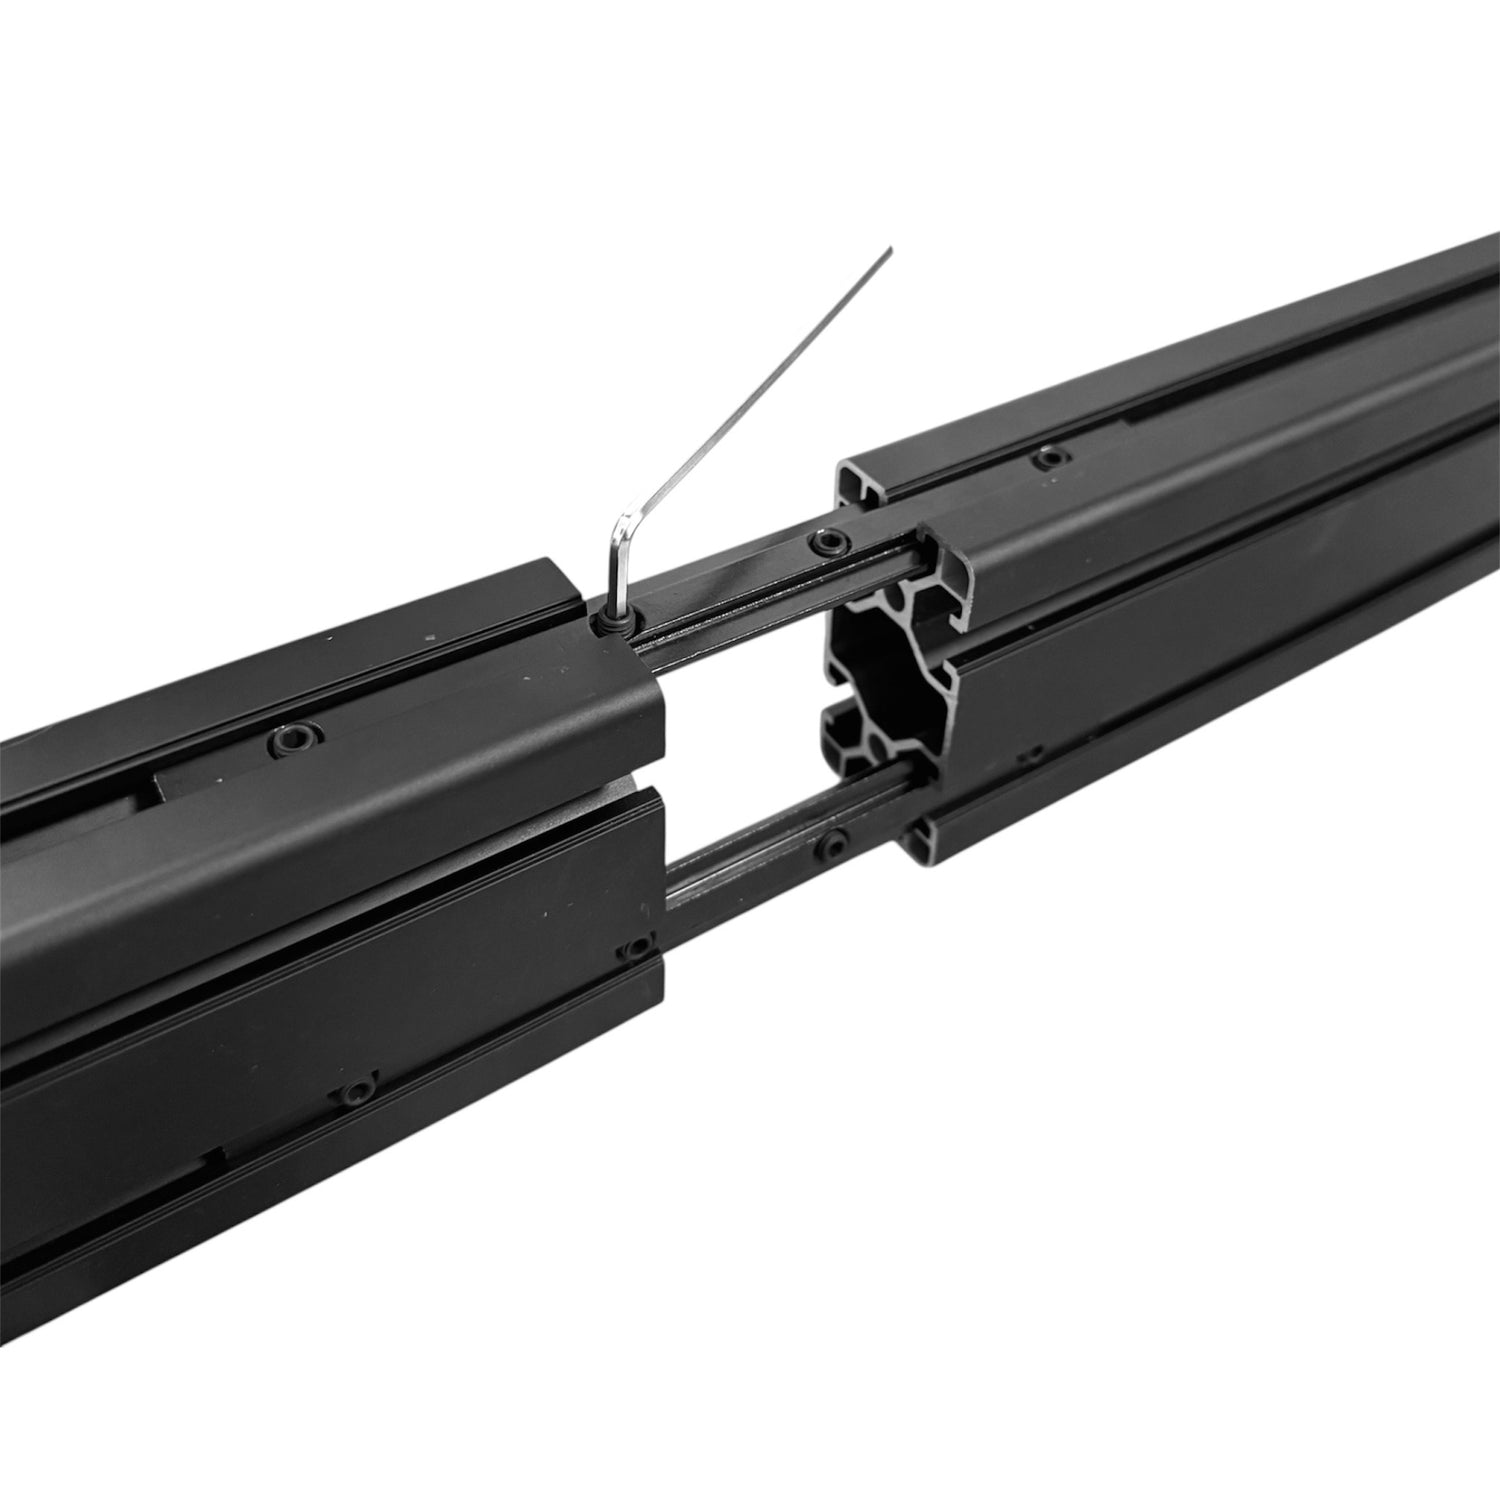
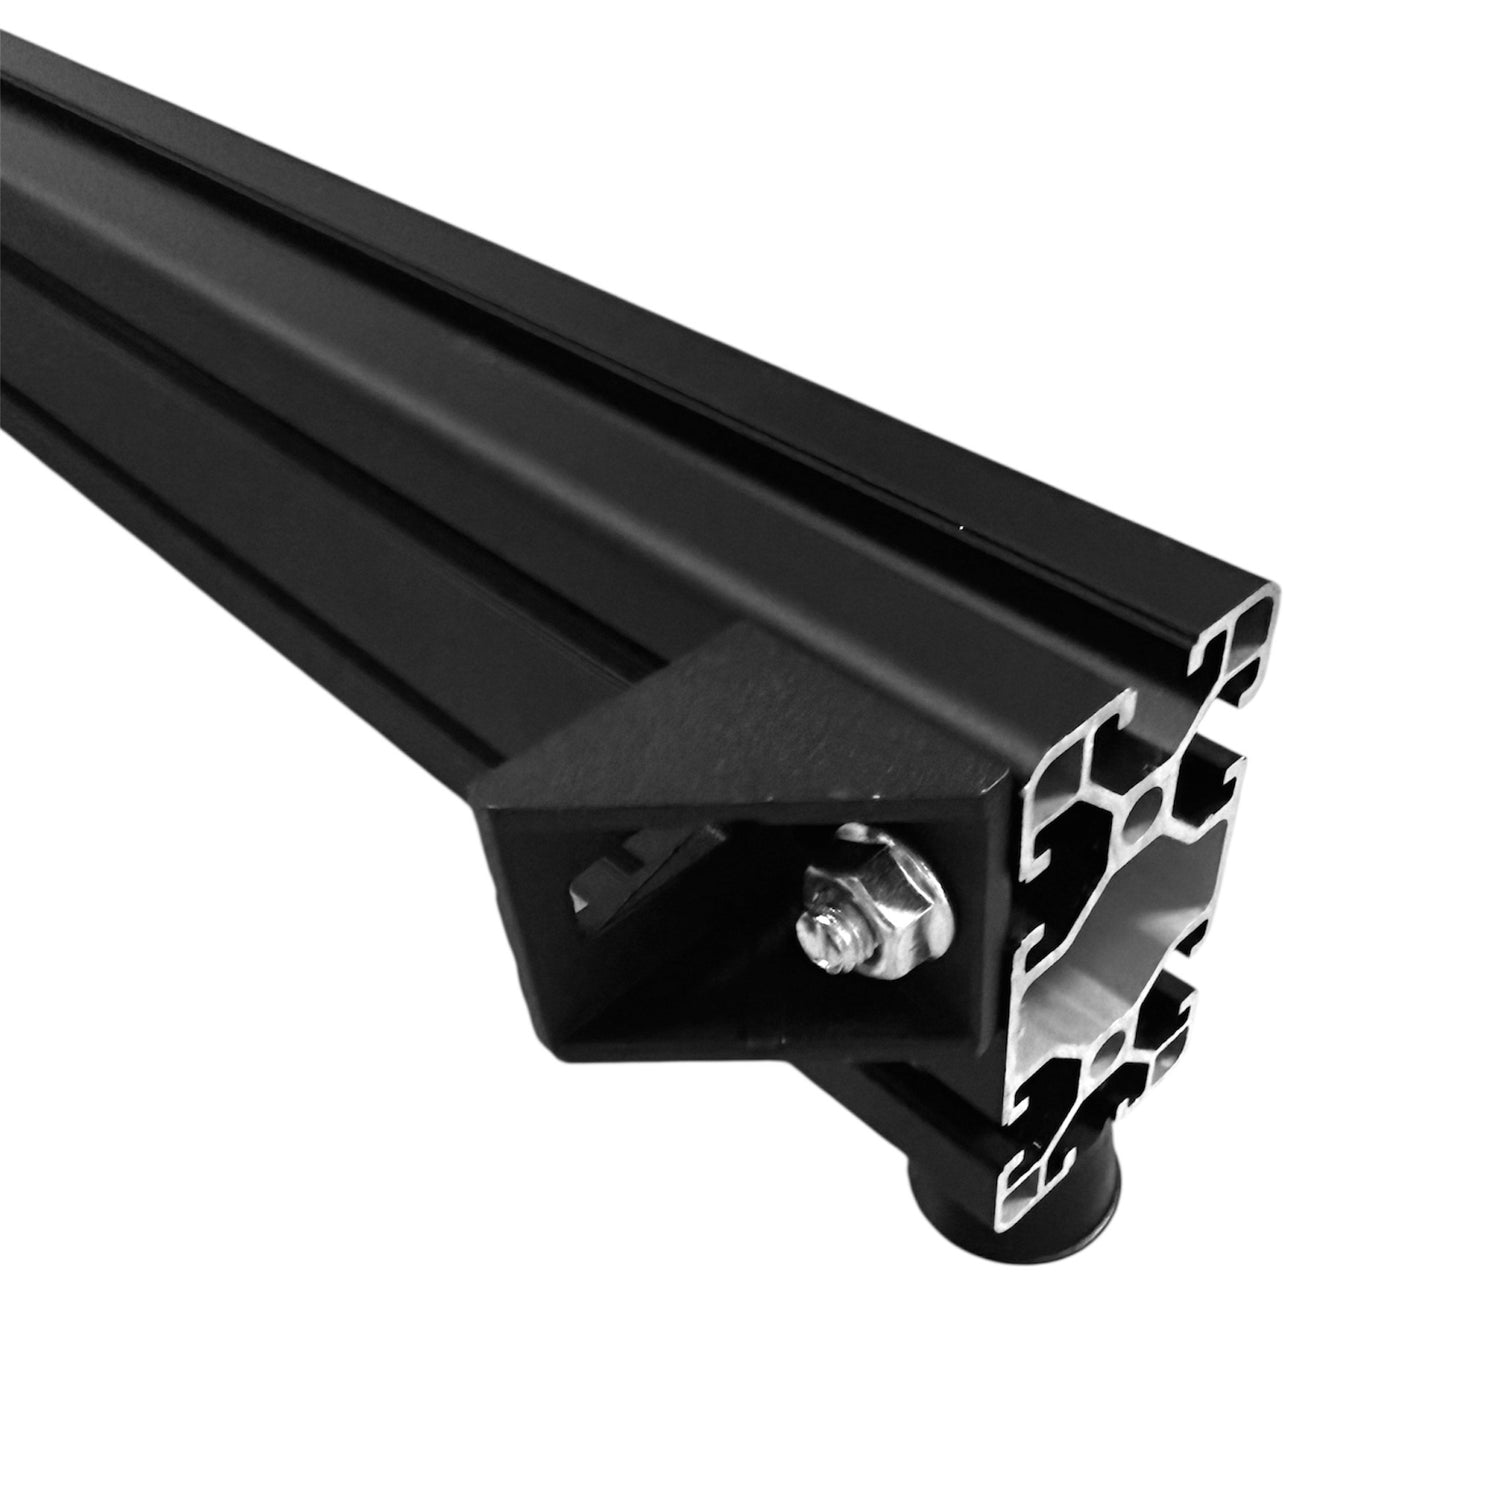
Use the long slotted connectors to join the one 4080 600mm to a 4080 700mm.
Leave the outside 2 channel open. The other channels can be filled with these connectors.
Lengthwise profile connectors are used at this step only so make sure to use all the ones you have.

The build
Attach all the feet to the bottom of the 1300mm piece (built from 600mm + 700mm)

The build
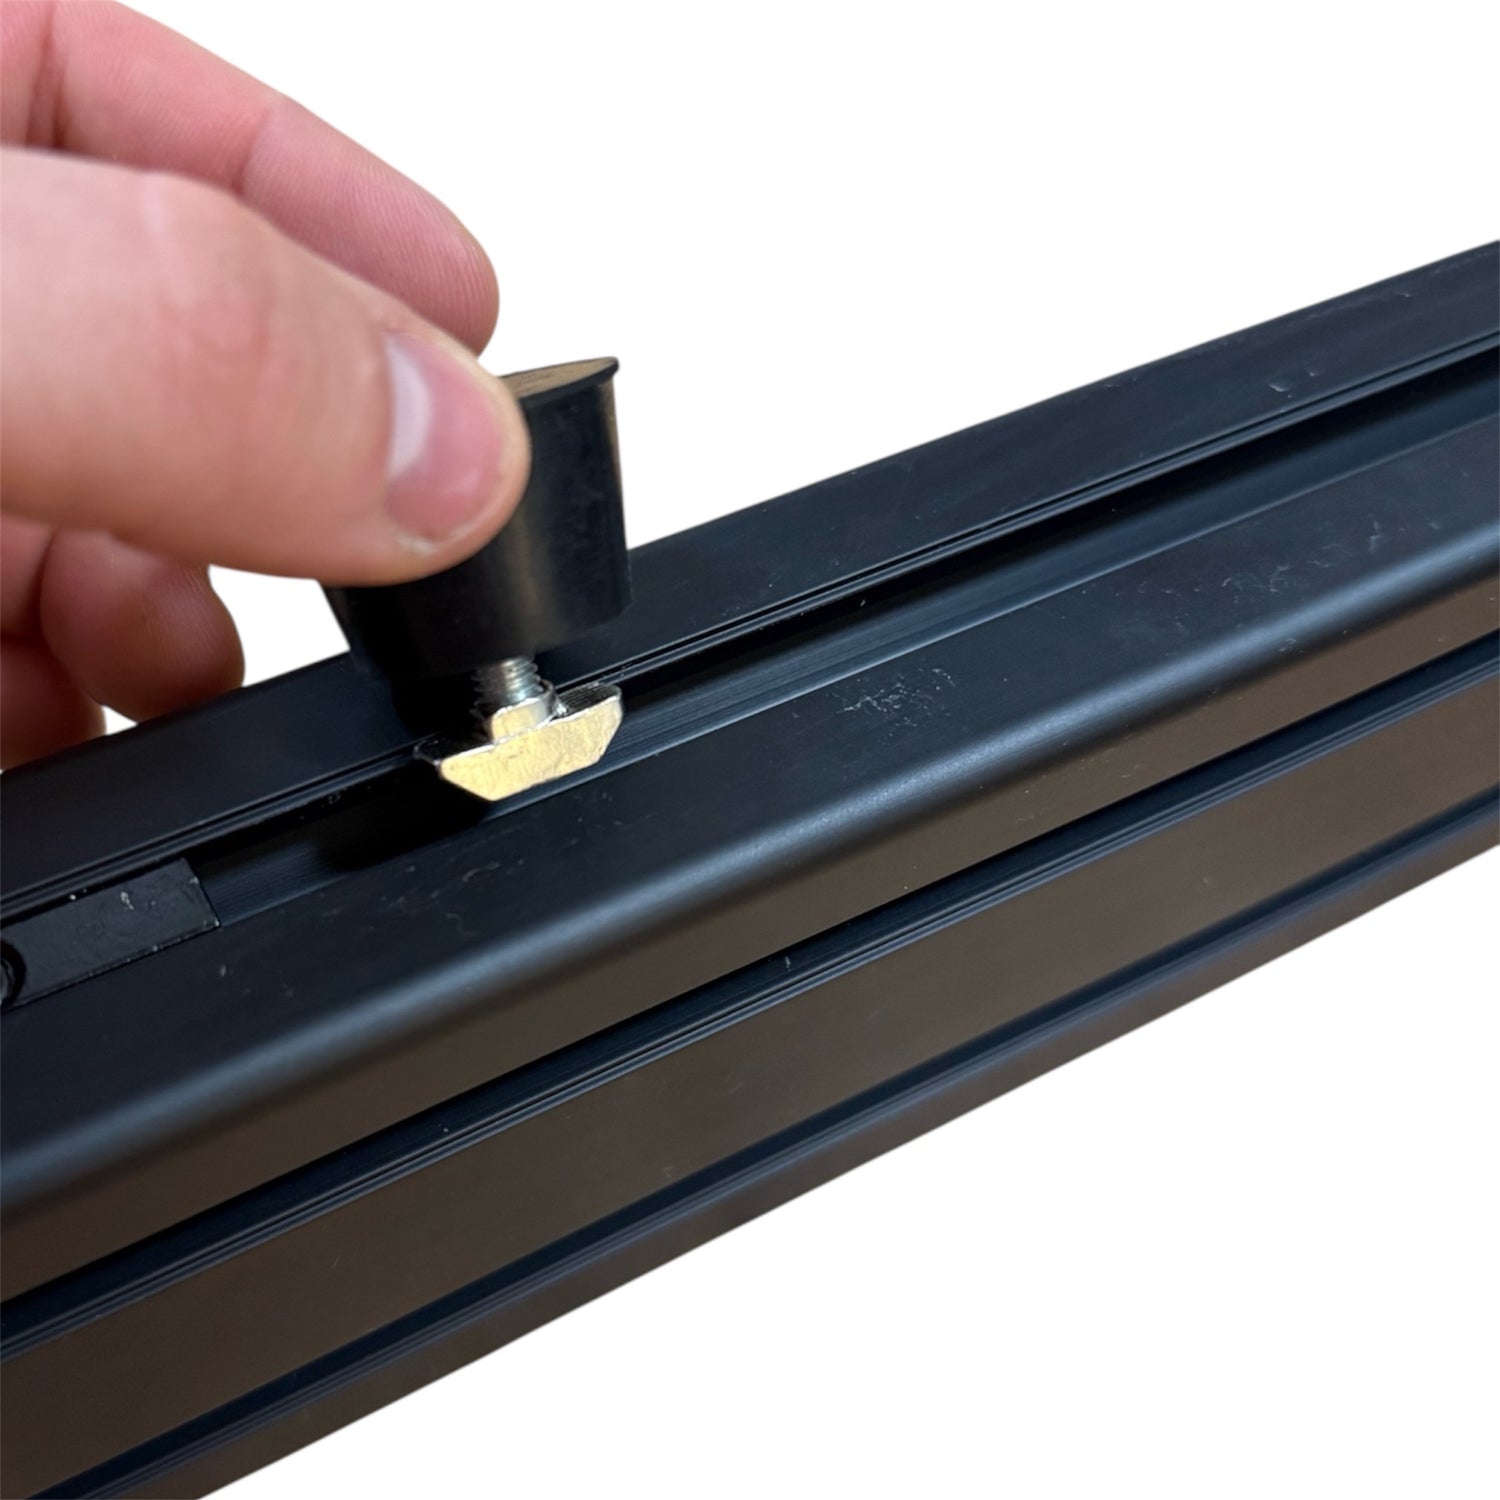
Connect the two long 1300mm pieces (these are the horizontal rails) with a 4080 500mm and capped brackets.
The build
Connect another 4040 500mm piece between the two horizontal rails with capped brackets. Tighten these finger tight.
The build
Make sure to space these out approximately the length of the profiles on the bottom of the seat.
Pedal plates
To build the, pedal plate start with planning how the pedals will connect. If it’s possible connect the front bolts of the pedals directly to profile. If not, place the front bolts as close to the profiles as possible for maximum rigidity.
If you have a pedal bar accessory it makes pedals with bolts from the underside much easier to connect.
Pedal plates
Note you can mix and match 484mm length between handbrake support and pedal supports.
Pedal plates
Once the pedals plate is built the safe assembly method is to disassemble and build the plate up directly attaching the sides to the horizontal rails. Alternatively the entire assembly can slide into and along the slots.
Pedal plates
Now that the pedal plate is on the rig go back and tighten all the bolts in the seat area.
The build
Pre assemble nuts and bolts into 8 of the aluminium L shape brackets and slide them into position along the outside of the frame. Slide them along in a lifted position to prevent scratches to the outside.
The build
Position the gap between the brackets approximately 600mm from the open end of the frame without the cross connectors.
The build
Use the spirit level on top of the upright to make sure its vertical and not leaning over.
The build
Slide / drop a 4080 700mm into each side. Keep everything loose to allow you to slide one bolt at a time into the bottom.
Do these up finger tight or tighten just one bracket as these might need to be adjusted.
The build
Attach heavy duty brackets to the top plate supports.
Steel top plate
If you have the steel top plate attach the protective rubber then attach a bolt a nut to the slot.
Steel top plate
Slide the top plate down the uprights into position.
The build
Slide / drop a the top plate supports onto the inside of the uprights.
Test fit
Before tightening everything up it’s time to do the first rough fit.
Test fit
The seat which has the 400mm seat support on the bottom can be placed on top of the 500mm braces connecting the horizontal beams.
Test fit
Check the distance from the seating position to where the wheel is expected to be.
This stage is not expected to be fine tuning, typically adjustment can be done by moving the pedals and seat but for people who are extra large or extra tall you may need to move the upright to a better position.
The build
Now that the rig is roughly set up with the correct dimensions connect the seat to the rig.
The build
Tighten the upright brackets while using a spirit level to make sure they are vertical.
The build
Bolt the top plate to only one side of the top plate supports. This will hold the wheel in place while doing the test fit.
The build
Disconnect the other support from the upright then connect it to the top plate.
The build
Using the spirit level on the top plate adjust the other support so that the top plate is level reconnect the support to the upright.
The build
Slide 3 brackets down the outside of one of the upright for the handbrake support bar.
The build
Slide the last remaining 484mm piece into this position.
Note: if you don’t want to use a handbrake this part can be connected to the pedal assembly for extra support. Extra fasteners or brackets may be required.
The build
Use the universal brackets to attach your shifter, handbrake, and other accessories.
The build
Add caps to all exposed aluminium profile faces. A firm push will get them mostly into place and a few taps will finish them off.
The build
Fasten the wheelbase to the top plate and check fitment.
We recommend adjusting the seat and pedals before adjusting the wheelbase and top plate as the top plate is the hardest to move.
The build
To make fine adjustments use the markers to provide temporary support and/or a way to remember the position of the top plate.
We recommend removing the wheelbase and top plate and following the above process for reassembly to prevent scratches.
The build
Once you’re happy with the positions go through and tighten everything back up.
After the first hour or two of racing its good practice to tighten everything back up again as everything settles into position.
The build
Finally, mount any accessories and use the included cable management clips to route the cables inside the profiles.
The build
Accessories may need partial disassembly to fit depending on your arrangement. Use the included markers to remember the location of any parts you have taken off.
